Vegetarian tortilla soup
This is something that my family can eat by the gallon. In fact the day I made this batch that I took pictures of here, I ate it for both lunch and dinner.
It's just that good.
This is a recipe that I got out of a magazine and like most recipes I come across, I not only tweeked it to make it my own, I also made it vegetarian to fit our family. I created it when I was on a crazy diet a couple months ago and really had to watch every calorie that went in. So the best part about this recipe is that I calculated the calories and are you ready for this?
It only has 88 calories per 2 cup serving!!!!
(not including the garnish)
Here's what you will need
Vegetarian Tortilla soup
- 1 onion (diced)
- 2 jalapenos (seeded and diced. *Note-the more seeds the more spicy)
- 2 C diced tomatoes
- 2 limes juiced
- 4 cloves diced garlic
- 1/2 C cut cilantro
- 8 C vegetable broth (see photo)
- 4-10 corn tortillas
- 2 C cooked black beans
- Cotija cheese (garnish)
- crunched tortilla chips (garnish)
Start with your fresh produce. Your tomatoes, onion, peppers, lime and garlic.
 Get them diced up and saute them in a deep stockpot with a little oil. I use corn oil for this one but you could probably do olive oil or whatever you have on hand.
 Cook this on medium-high for about 20 minutes or until it starts looking a little mushy. Then I help it out a little by taking a potato masher to it just to mush it down a little more.
 The time varies but the consistency is more what you are after here. You want chunks, but you also want soup. It should look something like this...
 Once it looks right add the vegetable broth.
This one is my favorite as I have tried many, many different vegetarian broths and truthfully, this is the one that tastes the best (and most like REAL broth) There are a lot out there that just taste like salty water and in no way take the place of chicken broth that a lot of recipes call for. This one substitutes perfectly well. So much that I can't tell the difference, and I am a tough critic.
It comes in a gooey paste that you use 1 tsp of "goo" to 1 cup water to make the broth. Or for this recipe, I use a heaping Tbsp to an 8 cup pitcher to make it.
This is the color you are looking for here.
 So add all the broth and 2 cups of cooked black beans, 1/2 cup (or more if you like) cilantro.
 Let the works come to a soft boil for a couple minutes.
Next we add the corn tortillas. You slice them into 2 inch strips and dump them into the pot to thicken up the soup.


 It should take about 30 minutes on medium heat to thicken. Now mind you, this is not chowder or anything, so just get it as thick as you like it.
I then top it with grated cotija cheese. Which if you are unfamiliar with this, it is a salty Mexican goat cheese sort of like Parmesan. It is found in the Mexican section of the dairy aisle.
 It is delightful, but a little goes a long ways and it is about 100 calories per 1/4 cup, so pace yourself :) Also I did not include the garnish when I calculated the calories but the entire dish is healthy enough that a little cotija won't kill anyone.
Also I crunch up some tortilla chips for added texture.
And voila!!! The end product of perfection!!!
 Try this and tell me it is not fantastic!!
I serve it with cheese quesadillas. It's always a winning combination in my house.
***************************************************************************
Spanokopita is all ya need-a

This is my New year's "go to" dish that I bring to parties. It always seems to please a crowd and impresses the unimpressed. It really is pretty easy with a little ground work.
I like to use my pesto recipe for all kinds of things and this one comes in handy here.
Spanakopita
- 3 cups pesto
- 1 medium bag spinach
- 2 cups sun dried tomatoes
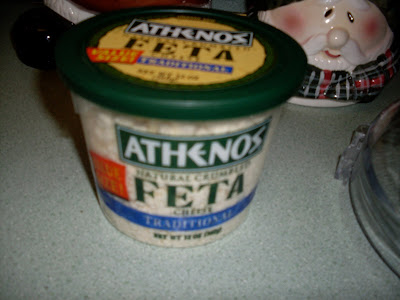
- 1 1/2 cups (or more if desired) feta crumbled
- fillo sheets
- 1-2 Tbsp sugar (depending on taste)
- 1 stick butter
- steam the spinach and blend up in a food processor along with the sun dried tomatoes


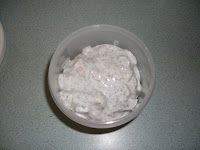
- Mix together the feta and pesto with the spinach, tomato mixture. I like to use enough feta to make it good and marbled. If you use too much it will be very salty so add some and taste. If it tastes like it needs more, then add more.


- Take your fillo dough out and make sure it has thawed for at least 1/2 hour so that it can be worked with. Lay it out and cut it (I use a pizza cutter) into about 4 inch strips.


- Next separate 2 or 3 sheets to work with.

- Next spoon about a Tbsp of mixture into the bottom corner.

- Fold over in a triangle and then up in another triangle. For lack of better illustration, fold it like a flag in a triangle pattern.


- Lay the triangles on the cookie sheet and brush with melted butter

- Bake at 350 degrees for about 30 minutes or until they look golden . Not brown, just golden.


************************************************************************
My all time best cookie recipe

So brace yourself for my all time best and favorite cookie recipe. I only make these at Christmas time because I can't keep my dang hands out of the cookie jar when they are around. They are just that awesome. Combining my 3 great loves. Cranberry, orange and lots of butter. What could be better than that I ask you?
I got this several years ago from Martha Stewart but I have tweeked it and made it my own as I do most recipes.
This recipe as I give it will yield you about 3 dozen but they are small. (This is why they are dangerous to keep around because you can eat 5 or 6 without really noticing)
Cranberry Orange Cookies
- 1 1/2 Cup sugar
- 6 sticks butter (yes I am serious:)

- 3 eggs
- 3 t vanilla
- 2 oranges shredded and juiced. You need the zest, the peel and the juice. All of the orange.

- 3/4 t baking soda
- 3/4 t salt
- 8 1/2 cups flour
- 1 jar crystallized ginger (I know this is a terrible picture, but it was the best I could get and I really wanted to show you what it looks like so you can find it in a store as it is tricky to locate)

- 1 (12 oz) bag craisens


Just by reading the ingredients, you'll see why these are super decadent and are "once in a while" cookies.
1.) Mix the softened butter and sugar in mixer.
2.) Slowly add all wet ingredients.
3.) Mix all dry ingredients and add spoonful at a time as the mixer runs on medium speed.
4.) Add craisens last.
**Depending on the size of your mixer bowl, it may not all fit in the bowl. I was able to mix most of it all but the last cup of dry ingredients or so. Just as a heads up.
5.) Refrigerate this dough for 24 hours before baking to get the butter oils good and blended.

6.) Bake about 10 minutes at 350 degrees.
Savor and enjoy and put the recipe away until next holiday season. Your waist line will
thank you!
****************************************************************************
Baklava for all of ya!!
So the Holidays are upon us and with them come holiday baking. My favorite time of year!!
Today we are making my favorite Greek pastry,
Baklava!!
I got this recipe from my Mom years ago and have tweeked it to make it my own. It really is very simple but always seems to impress the masses. So have fun with this and amaze all your friends as you master the art of baklava.
Here's the recipe and then I'll walk you through it.
Baklava
1 package fillo dough
1 1/2 -2 sticks REAL melted butter (margarine won't cut it)- more as needed
3/4 cup brown sugar
3/4 cup granulated sugar
2 cup finely chopped walnuts (or the nut of your choosing, I just prefer walnuts)
1 TBSP cinnamon
1/2 tsp nutmeg
3/4 - 1 cup honey
First thing you want to do is thaw your fillo dough for about 1/2 hour or more before you work with it. You want it to be a little frozen, but not melty and mushy.
Mix all dry ingredients... sugars, cinnamon & nutmeg in a bowl and set aside.
 Next chop up your nuts. You could use a nut chopper or do what I did here which is just as effective. Put all the nuts in a big ziplock bag and pound the snot out of it with a meat tenderizer.


Lay a couple sheets of philo in a casserole dish.
Brush on butter and sprinkle dry ingredients and the nuts liberally.


Layer like lasagna and repeat until you have several layers.
Always brush liberally with butter and sprinkle with the goods.
If you run out, just mix up some more. The measurements are pretty loose and I have been known to use more or less of a few ingredients.
When you are done layering, cut out squares and portion out triangle as it is hard to work with once it is baked.
Bake at 350 for about 20 or so minutes until it looks golden and crunchy.
Pull it out and evenly pour the honey over the top and get it into all the nooks and crannies.
Let it sit and cool off for a couple hours to make sure the honey got in all the cracks and because in my never to be humble opinion it tastes better at room temperature.
Eh Voila!!
Enjoy!!
Today we are making my favorite Greek pastry,
Baklava!!
I got this recipe from my Mom years ago and have tweeked it to make it my own. It really is very simple but always seems to impress the masses. So have fun with this and amaze all your friends as you master the art of baklava.
Here's the recipe and then I'll walk you through it.
Baklava
1 package fillo dough
1 1/2 -2 sticks REAL melted butter (margarine won't cut it)- more as needed
3/4 cup brown sugar
3/4 cup granulated sugar
2 cup finely chopped walnuts (or the nut of your choosing, I just prefer walnuts)
1 TBSP cinnamon
1/2 tsp nutmeg
3/4 - 1 cup honey
First thing you want to do is thaw your fillo dough for about 1/2 hour or more before you work with it. You want it to be a little frozen, but not melty and mushy.

Mix all dry ingredients... sugars, cinnamon & nutmeg in a bowl and set aside.
 Next chop up your nuts. You could use a nut chopper or do what I did here which is just as effective. Put all the nuts in a big ziplock bag and pound the snot out of it with a meat tenderizer.

Lay a couple sheets of philo in a casserole dish.
Brush on butter and sprinkle dry ingredients and the nuts liberally.


Layer like lasagna and repeat until you have several layers.
Always brush liberally with butter and sprinkle with the goods.
If you run out, just mix up some more. The measurements are pretty loose and I have been known to use more or less of a few ingredients.
When you are done layering, cut out squares and portion out triangle as it is hard to work with once it is baked.

Bake at 350 for about 20 or so minutes until it looks golden and crunchy.

Pull it out and evenly pour the honey over the top and get it into all the nooks and crannies.
Let it sit and cool off for a couple hours to make sure the honey got in all the cracks and because in my never to be humble opinion it tastes better at room temperature.
Eh Voila!!
Enjoy!!
****************************************************************************
Cream of this and that......

One of the most common staples in any kitchen and in numerous comfort food recipes are cream of mushroom, cream of chicken, cream of celery soups. They are everywhere you look. Especially at the holidays. You just can't have a good green bean casserole without the cream of mushroom in there bringing it's mushy goodness.
But have you ever really stopped and looked at the ingredients on the can? It's pretty groody. There are a whole lot of preservatives and things I can't pronounce but one very bad thing I can pronounce that it is chocked full of. MSG.
But have you ever really stopped and looked at the ingredients on the can? It's pretty groody. There are a whole lot of preservatives and things I can't pronounce but one very bad thing I can pronounce that it is chocked full of. MSG.
 MSG, or monosodium glutamate, is a “flavor enhancer,” it makes food taste better by stimulating the taste buds. It is an inexpensive additive used to make foods seem more flavorful without any additional effort or special techniques.
Trust me you want no part in any of that.
But with little effort you can make your own "cream of whatever soup". I make a big batch and freeze it in can size portions so I am more inclined to use the real McCoy instead it's nasty counterpart.
It is a basic Roux or Bechamel sauce. Or as we like to call it here in America, a white sauce. It sounds better in French. Here's the recipe, but do follow the directions as it is a bit of an art form to be able to make a good roux.
- 4 Tbsp butter
- 4 Tbsp flour (all purpose)
- 1 Cups milk
- 1 Cup broth (I use vegetarian, but most people use chicken)
- salt and pepper to taste
- 1/2 Cup (insert type of cream of something ingredient)sauteed mushrooms,shredded chicken, sauteed celery
In a sauce pan melt the butter over med/high heat
 Add the flour stirring constantly so that it doesn't burn
 I like to use a silicone spatula rather than a wire wisk but it is just a preference. I feel like I can smooth out the lumps easier. But I know I am often alone in this debate.
Keep the sauce moving as it will clump up and burn really easy
 Next start to trickle in the milk a couple spoonfulls at a time. Stirring constantly. This will take both hands and uninterrupted attention. It's only a couple minutes. Just watch what you are doing because it can turn south pretty easy. Pour in a little milk and stir until smooth getting out all the lumps. Then pour in a little more. Then start in with the broth and do the same thing.


 Soon you will have a nice cream sauce.
Last, add your flavor. Here I made cream of mushroom, so I added sauteed mushrooms.


 I then put 2 Cup portions into a freezer safe containers like these canning containers that I discovered this summer. They were intended for freezer jam but they work perfectly for this purpose.
 Once these have cooled they are about the same consistency as the canned cream of mushroom soup. That sort of gel substance. But with these you know exactly what is in there and it is far better for you than the other. Plus I think these taste better.
I have even used this for simple comfort cooking like over browning chicken. It's pretty tasty!
****************************************************************************
Flatbread from the Heavens
So today's magic wonder is what I like to think of as manna from heaven. I give you the wonders of flat bread. Or naan or pita. How ever you call it, it spells awesome.
It is easy to make with the right ingredients. My husband is making these today. He does a lot of the cooking around here because he really likes to cook.
You will need
It is easy to make with the right ingredients. My husband is making these today. He does a lot of the cooking around here because he really likes to cook.
You will need
- 3 Cups flour
- 2 Tbsp baking powder
- 1/2 Cup buttermilk
You are also going to need upwords of 1 cup of water to bind together the dough.
Ok so lets get going here.
Mix together the main ingredients.


It is easiest to just use your hands to mix this together rather than use a spoon or anything else. It is mainly about feeling when the dough is right. As you mix it together, add water as needed to get a nice sticky dough.It needs to be sticky somewhat, but still workable. Much like fresh play doh.
When you get the right consistency, smash it down with your knuckles to work it down.

Once it is workable, divide it several times until you have 8 plum sized balls.

Roll them smooth and set aside for about 10 minutes to rest the dough.


Next you will need to roll them out into about 6 inches in diameter. You will want to roll it out to about the thickness of a tortilla. I like to roll them all out at once and stack them up with wax paper separating them.


Now you are ready to fry these bad boys up.
I did it on a super hot griddle but I think you could do it on a stovetop frying pan.
No oil or anything. Just straight on the griddle. Take your hands to loosen it up on the griddle as soon as you set it down. You basically want to flip it about every 10 seconds. You want to keep it moving. I found that a utensil slowed me down and fingers worked just as well.

You want to grill these flipping them about every 10 seconds until they have brown spots all around and they start to bubble up a little.

When they look like this.... they are done.

And voila...glorious flat bread.
Make yourself up some nice curry or falafel and you have a great meal.
**Note- these only really keep a couple days so make them fresh when you do have them. It really only takes about 1/2 hour from start to finish. It is defiantly worth the effort.
*****************************************************************************
The perfect pie crust
I have never been much of a cake person but you bet I'll eat my own weight in pie. I loves me some pie.
I have found that the perfect crust makes all the difference. Needless to say that I am NOT a store bought pie crust kind of girl. I like it fresh and homemade.
And so I give you....... The perfect pie crust.
ta-da.
Ok so here's what you will need.
I have found that the perfect crust makes all the difference. Needless to say that I am NOT a store bought pie crust kind of girl. I like it fresh and homemade.
And so I give you....... The perfect pie crust.
ta-da.
Ok so here's what you will need.
- 2 3/4 cups flour
- 1 Tbsp sugar
- 1 1/2 tsp course salt
- 2 sticks cold butter cubed
- 7 Tbsp ice water
- In a food processor mix all the dry ingredients well.
- Next, add cubed butter and pulse until mixture is crumbly.

- Add 7 Tbsp of ice water 1 tbsp at a time and pulse until a dough forms. Note- it will be lop sided in the food processor.

- Divide into two and refrigerate covered for at least 1 hour. (but I do it overnight)
When you are ready to use it, let it come to room temperature for about 20 minutes or so. Just until you are able to work with it . Think the consistency of play doh.
Flour down a pastry sheet like this one...

( I know a good Tupperware consultant if you need one :) plug,plug)
I use a marble rolling pin and roll it into a circle with a 12 inch or so diameter.
Notice you have 2 of these pie shells? Well you can either make a double layered pie or make 2 pies at once like I usually do.
Just add your filling and bake at 350 for about 30 minutes or until you see the crust getting light golden.
This crust is buttery and flakey every time.
*********************************************************************************
Bring on the hummus!!
Something that gets eaten up in a flash in this house is hummus.
We go through the stuff like you would not believe. So I decided to go on a quest for the perfect recipe and ended up making my own a couple years ago.
The rest my friends is history.
Hummus is one of those things that is moderately healthy and super tasty as a dip or as my vegetarian husband discovered, a great spread base in a veggie wrap. Instead of using mayo or even worse cream cheese, he would slath on the hummus, add some sprouts, tomatoes and maybe some romaine and have himself a fine wrap on a wheat tortilla. It's mighty tasty. Not to mention filling because of the bean protein.
I have tried several recipes but I just couldn't find one that had all the things I liked most, so I made up my own.
Lucky you, I'll share :)
Start with dried garbanzo beans. You can do store bought, but they always seem sort of oily and slimy and Lord only knows what is in them to get them that way. Don't be afraid to do homemade. It is really very easy.
With this batch which is larger than you may want so you might cut the whole recipe in half if you like.
3 Cups dried garbanzo beans (I get these in the bins at most grocery store health food sections)
*** When they are cooked you will end up with about 6 cups of beans. They double in size.

- put the beans in a pot of water. Enough to cover and even an inch or two more as it cooks off.
- cook on medium heat for about an hour or until they soften enough to chew without crunching. You don't want them gooey. Cooking too long will make them mushy and that is not what you want. You just want to rehydrate them.
- drain all the water in a colander

- puree the beans for about 4 minutes or until they are smooth
- add the rest of the ingredients and keep pureeing until it all looks like paste (sometimes I end up adding a little more liquid (lemon juice,oil,even water) if it seems a little chunky. The consistency is sort of important here)

- 1 1/2 Cup sesame oil
- about 10 cloves of garlic (you can do less, I just like it zingy)
- 2 Cups lemon juice
- 3 Tbsp cumin
- 2 Tbsp nutmeg
Also I like to do big batches because I portion it up and freeze it. It will keep nicely for at least 3 months in the freezer. Preferably in Tupperware.
This and a bowl of tortilla chips make for a nice snack and you don't feel all heavy and bloated (not to mention full of shame) like you do with regular chips and dip.
So give it a try and let me know what you think.
*****************************************************************************
Beans beans the magical fruit!
This is one of my favorite picnic potluck salads to bring and it comes together really easy if you have a lot of basics on hand. I know I may be alone in this, but at any given time I have a boat load of beans cooked and ready to rock at a moment's notice.
To do this just buy dried beans. Black beans, pinto , white, kidney. It is really pretty cheap too. I buy in bulk because I cook in bulk. But any amount will only run you under a dollar a pound. Much cheaper to do this than buy the canned beans.
Then once you have your dried beans, soak them overnight.This is said to reduce how gassy they will make you. Then throw them in a crock pot and cover with water. Cook on med high until they are soft. Or cook on the stove top. Just make sure they are always covered in water as the water tends to cook off and absorb quickly. This will take about 3-5 hours depending on how hot you cook them at.
These are awesome because they freeze really well and it is nice to always have beans on hand for pasta salads or quick burritos. Throw black beans in an omelet. Soo good. Plus it is added protein. My husband and one of my kids does not eat meat so this is a nice substitute to bridge the gap.
Plus you can whip nice little numbers at a moments notice like this one.

Black bean corn salad
- 4 C cooked black beans
- 3 C frozen kernel corn
- 1 red pepper bell diced
- 1/2 bunch of cilantro chopped or I have used parsley (but I like cilantro better)
- 1/2 C chopped red onion (optional)
Dressing
- 2 C cider vinegar
- 1 Tbsp Dijon mustard (in a pinch I have used yellow mustard)
- juice and zest of 1 lime
- 3 Tbsp cumin (the cumin is the magic ingredient that brings it all together so don't skimp on it)
- Mix all ingredients well and serve cold.
The great thing about this salad is that it is nice and zingy but really healthy at the same time.
*****************************************************************************
Not your mother's pizza.
So now that you have the recipe for the world's greatest pizza crust it is time for awesome toppings.
These are my 2 favorite pizzas that I have sort of copied off of versions I have had at restaurants. My favorite pizza joint on the planet is a place in Anchorage Alaska called "The moose's tooth'. If you are ever in Anchorage, I highly recommend giving them a try.
Personally I am not a basic pepperoni kind of girl. I like something interesting and unusual on my pizza.
Thai chicken pizza
Use the basic pizza crust for both of these.
Then lets start with a sauce.
1/4 C bankok peanut sauce (this isn't an advertisement, this is just the brand that I use and like the best)

mix in about 2 or 3 Tbsp of soy sauce and 2 Tbsp peanut butter
( you can add less sauce and more soy sauce if you don't want it as spicy. It really isn't too spicy, but everyone has a different idea of how hot is too hot.)
This is your base sauce.
Top your pizza with
1 Cup mozzarella
1/2 C shredded carrots
3/4 C bite sized cubed cooked chicken
1/2 C bean sprouts
Bake on a pizza stone for 9 minutes in a 500 degree oven
Then add about 1/2 bunch of snipped fresh cilantro

And Voila!! This is an awesome pizza with a nice kick.

Next is my other favorite.
Greek pizza
sauce
1 can tomato paste
3 Tbsp pesto
Mix the two together until smooth.
Top your dough with sauce and then..
1/2 Cup mozzarella
1/2 C feta

1/2 C sliced calamata olives

1/2 C snipped fresh parsley

3/4 C diced fresh tomatoes

Bake this for 9 minutes @ 500 degrees.
Then in a separate bowl mix together
1 C plain nonfat yogurt

1/2 cucumber peeled and cubed.

and about 1 Tbsp dried dill.
Mix together and drizzle over the finished pizza.
Note: The Tziki sauce does not reheat very well so keep them separate if you want to hang on to the leftovers.
I am sorry I didn't take a picture of the finished product of the Greek pizza. I realized this after it was completely devoured.
Both of these are favorites in my house. Not only are they a little something out of the ordinary, but they are a whole lot more healthy than a standard pepperoni pizza.
You can also mess around with the portions to give it more of a kick or less.
These are my 2 favorite pizzas that I have sort of copied off of versions I have had at restaurants. My favorite pizza joint on the planet is a place in Anchorage Alaska called "The moose's tooth'. If you are ever in Anchorage, I highly recommend giving them a try.
Personally I am not a basic pepperoni kind of girl. I like something interesting and unusual on my pizza.
Thai chicken pizza
Use the basic pizza crust for both of these.
Then lets start with a sauce.
1/4 C bankok peanut sauce (this isn't an advertisement, this is just the brand that I use and like the best)
mix in about 2 or 3 Tbsp of soy sauce and 2 Tbsp peanut butter
( you can add less sauce and more soy sauce if you don't want it as spicy. It really isn't too spicy, but everyone has a different idea of how hot is too hot.)
This is your base sauce.
Top your pizza with
1 Cup mozzarella
1/2 C shredded carrots
3/4 C bite sized cubed cooked chicken
1/2 C bean sprouts
Bake on a pizza stone for 9 minutes in a 500 degree oven
Then add about 1/2 bunch of snipped fresh cilantro

And Voila!! This is an awesome pizza with a nice kick.
Next is my other favorite.
Greek pizza
sauce
1 can tomato paste
3 Tbsp pesto
Mix the two together until smooth.
Top your dough with sauce and then..
1/2 Cup mozzarella
1/2 C feta

1/2 C sliced calamata olives

1/2 C snipped fresh parsley

3/4 C diced fresh tomatoes

Bake this for 9 minutes @ 500 degrees.
Then in a separate bowl mix together
1 C plain nonfat yogurt

1/2 cucumber peeled and cubed.

and about 1 Tbsp dried dill.
Mix together and drizzle over the finished pizza.

Note: The Tziki sauce does not reheat very well so keep them separate if you want to hang on to the leftovers.
I am sorry I didn't take a picture of the finished product of the Greek pizza. I realized this after it was completely devoured.
Both of these are favorites in my house. Not only are they a little something out of the ordinary, but they are a whole lot more healthy than a standard pepperoni pizza.
You can also mess around with the portions to give it more of a kick or less.
*************************************************************************
Basic pizza dough
This is really the best pizza dough recipe that I have come across and trust me when I tell you I have tried quite a few. I have a really hard time spending $15+ for a decent pizza and with our family growing, we can't get away with just one pizza to fill us up. It usually takes 2 or 3. It just makes sense to make our own instead of spending a fortune on bread and cheese.
I got this recipe from the "California pizza kitchen" cookbook and it really does taste like their signature crust. Obviously a brick oven would make it even better, but lets not get crazy.
I make this is the mixer (Vera).
But first, I get my yeast started activating in a small bowl and set aside.
1 Tbsp yeast
1/2 C warm water.(105-110 degrees)
Just combine the two and let them sit for about 5 minutes or so.

Next mix

1 1/2 C all purpose flour
2 tsp sugar
1 tsp salt
1 Tbsp extra virgin olive oil
then add the yeast/water mixture

Use the paddle attachment, as the dough hook causes the too much friction and raises the yeast more than needed.

Mix the dough until it is combined well but don't over work it. It should be somewhat gummy
Next, grease a bowl with about a Tbsp of extra virgin olive oil and let the dough ball sit for about 2 hours to double in size.

I put these in a Tupperware bowl and just rest the lid on. I don't seal them airtight. But I make several batches at a time.

Once the dough has risen, punch it down and let it rest for about 10-15 minutes.
Now it is ready to roll out and dress.
I roll it out on a counter top using a little flour and cornmeal.
Put on your fixins ( I will put some recipes for some great pizzas on here soon) and bake in a 500 degree oven for 9-10 minutes.
Yes I said 500 degrees. It totally puts your oven to the test. But it is really worth it.
More pizza recipes to come. But now you have a great base for a basic pizza.
I got this recipe from the "California pizza kitchen" cookbook and it really does taste like their signature crust. Obviously a brick oven would make it even better, but lets not get crazy.
I make this is the mixer (Vera).
But first, I get my yeast started activating in a small bowl and set aside.
1 Tbsp yeast
1/2 C warm water.(105-110 degrees)
Just combine the two and let them sit for about 5 minutes or so.

Next mix

1 1/2 C all purpose flour
2 tsp sugar
1 tsp salt
1 Tbsp extra virgin olive oil
then add the yeast/water mixture

Use the paddle attachment, as the dough hook causes the too much friction and raises the yeast more than needed.

Mix the dough until it is combined well but don't over work it. It should be somewhat gummy

Next, grease a bowl with about a Tbsp of extra virgin olive oil and let the dough ball sit for about 2 hours to double in size.

I put these in a Tupperware bowl and just rest the lid on. I don't seal them airtight. But I make several batches at a time.

Once the dough has risen, punch it down and let it rest for about 10-15 minutes.
Now it is ready to roll out and dress.
I roll it out on a counter top using a little flour and cornmeal.
Put on your fixins ( I will put some recipes for some great pizzas on here soon) and bake in a 500 degree oven for 9-10 minutes.
Yes I said 500 degrees. It totally puts your oven to the test. But it is really worth it.
More pizza recipes to come. But now you have a great base for a basic pizza.
*****************************************************************************
Pesto with gusto
This is a recipe that I got from my mother in law and modified a bit. I find that I use it to give spaghetti a little kick or as a pizza sauce. Or if you are like my husband and I tonight, you could just dip crackers in it and eat it straight out of the food processor :)
It is a really easy recipe to do too.
You will need a food processor or you could also do it in a blender.
2 C Extra virgin olive oil
1 C pine nuts
1/2 C fresh parsley
1/2 t salt
1/4 t pepper
10-15 large garlic cloves


Mix it well it the food processor.
Next add
3-5 cups of fresh basil

3-4 cups shredded Parmesan cheese

Mix well until it is all smooth


I put these in Tupperware snack cups and freeze them. I am not trying to sell Tupperware here, I am just telling you what I use. If you find that you can't live with Tupperware then that is between you and your culinary needs :)

***************************************************************************
My very best chicken enchilada
As promised, I will start getting some of my coveted recipes on here. I have also found a cool little site that lets me put my recipes on a printable recipe card. I am hoping that it goes as smoothly as it said it would, but we'll see.
So I now give you my recipe for my very best chicken enchiladas.

Start with the most off brand , straight out of Tijuana , enchilada sauce. My thought with this is that odds are this is as close to authentic as you are going to get. I am not a huge fan of "American-ized" ethnic food. I mean if you want to get nit picky, you would also probably not put cheese on any of this. But I am getting side tracked here.
Next you will need one of my before mentioned "best friends in the kitchen".

And also a 5 lb bag of frozen boneless skinless chicken breast.

Then throw the chicken and enchilada sauce in the crock pot and on high for about 4 or 5 hours.Or on low for about 7-8.

Just cook it until you are able to easily shred the chicken with a fork or tongs. I take a potato masher and shred it that way, but do whatever works for you.

Then you want to dump the chicken in the strainer so it is not quite so juicy and soggy.

Next you want to shred your cheese and get your tortillas heating up.
I do 2 corn tortillas at a time mostly because it just makes it stronger and less likely to tear.
Spoon about 1-2 Tbsp into tortilla and a sprinkle of cheese. Too much and your tortilla won't roll right.

Then just roll that bad boy up and throw it in a 9 X 13 pan.

You should be able to fit 10-15 enchiladas side by side in the pan. Spoon enchilada sauce over the works and cover with cheese.
Bake for about 35-40 minutes @ 350.
Top with grated cotija cheese, fresh cilantro and sour cream/ plain yogurt.
My family snarfs these down whenever I make them. I make a separate batch of just cheese enchiladas because I have a couple vegetarians in my family. This is really easy to do veggie too.
**********************************************************************************